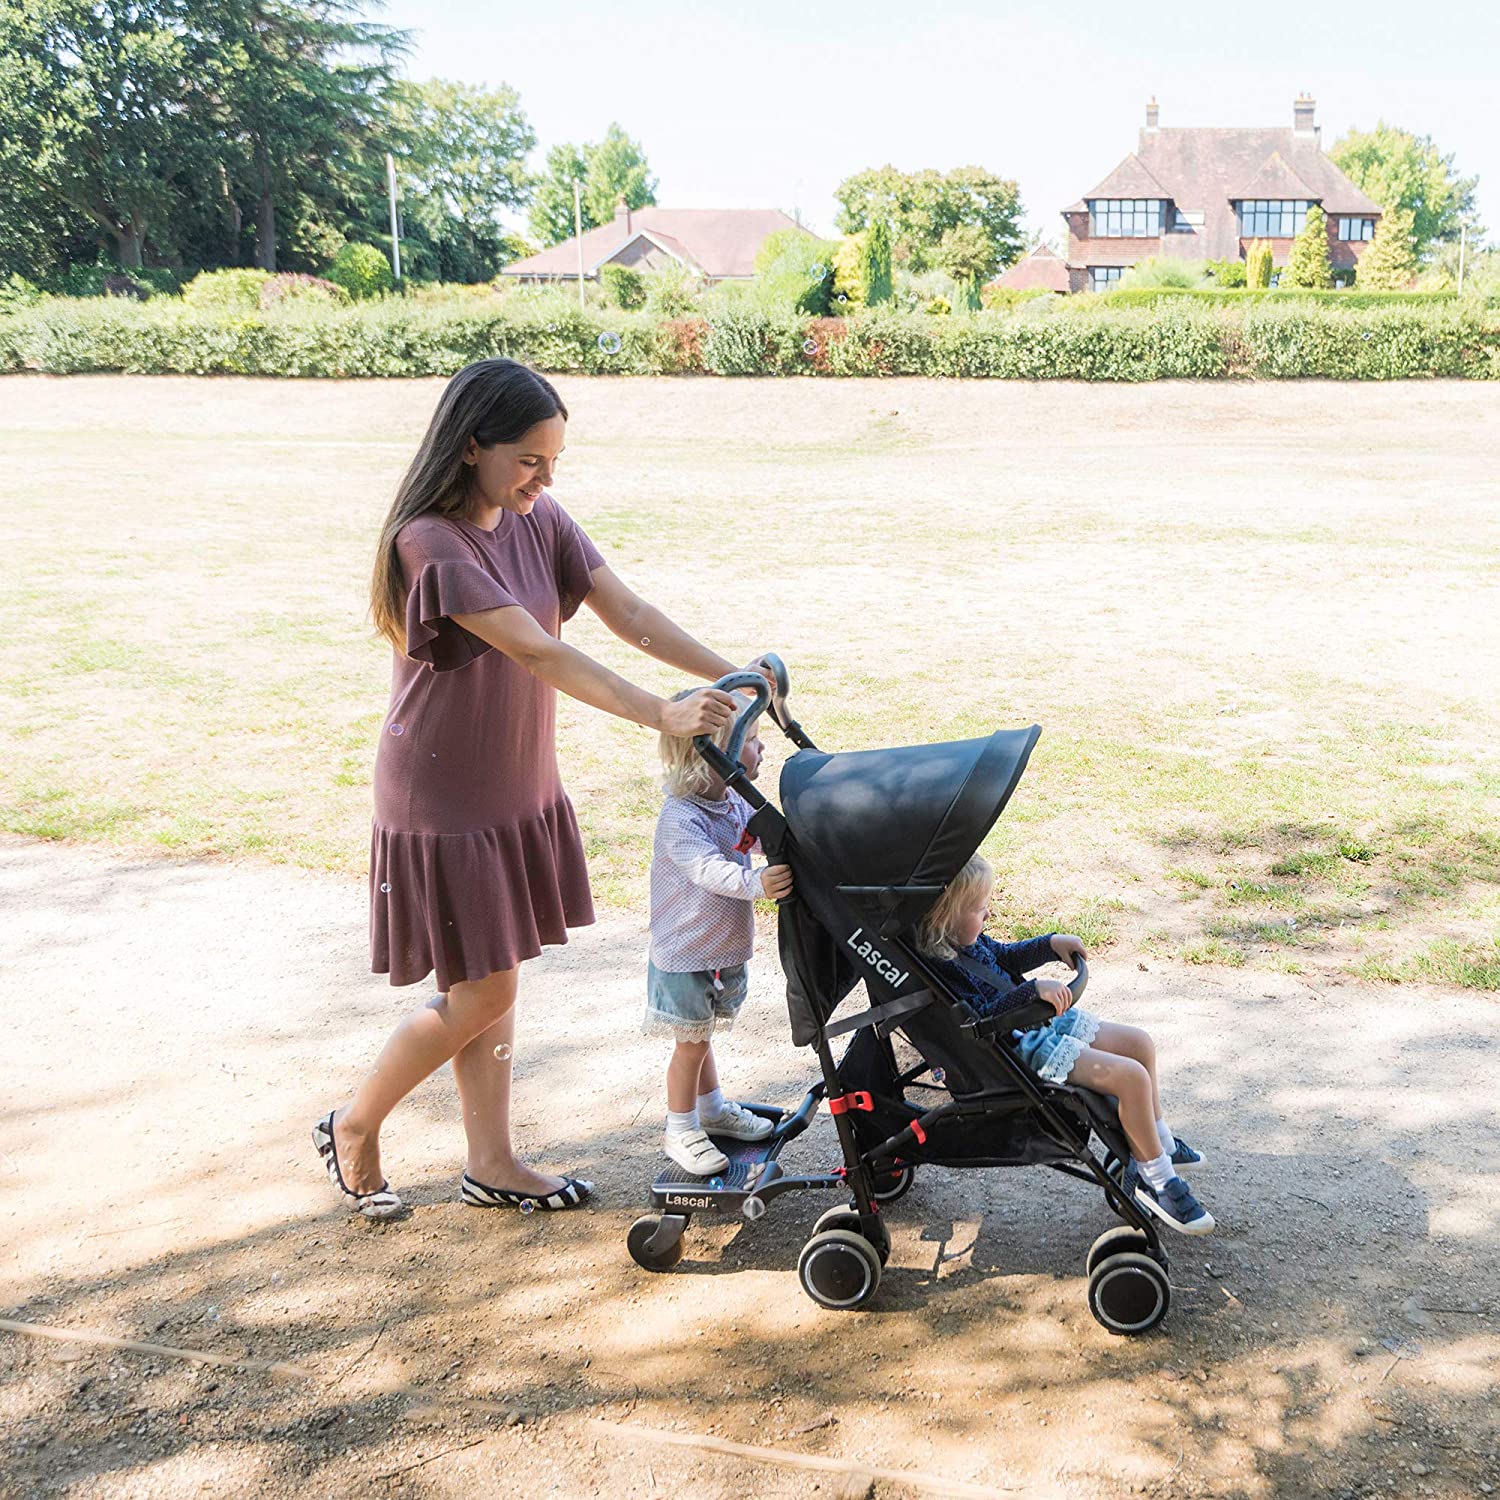

Although there is a broad range of brilliant buggy boards for you to choose from, knowing how to attach them isn’t always as straightforward as buying one, that’s why we have created the ultimate buggy board fitting guide for you!
Fortunately, although each buggy board is different, there is a generally universal approach to attaching them. For more detailed instructions, always refer to the manufacturer guide.
Here is our ULTIMATE buggy board fitting guide:
Step 1- Start with the wheels & arms
First things first, lay out all of your buggy board parts in sections so you can find all the bits you need with ease. Make sure you have all the relevant tools required before starting (i.e. screwdriver with correct head, spanner/pliers etc.)
- Turn the board upside down and look for the correct areas for the wheels and arms to go – as directed in your manual
- The wheels should easily click into place
- The arms will need to be attached by using the screws, nuts, etc. in your pack. Tighten accordingly so that everything is secure
Step 2 – Connectors
The glue that holds your buggy board and pushchair together!
Bear in mind; connectors can be attached facing forward of backwards. Connectors can be fitted onto different pushchairs, as long as the tubing doesn’t exceed a circumference of 22.5cm (9 inches)
- Bend the strap around the tubing while you feed the strap through the connector cover slot. As it comes through, pull the strap gently
- Make sure you check the position of the connectors to make sure the arms can reach the connectors with the extenders above the ground (check manufacturing guide for exact measurements!) At the same time, the connectors should be as low as possible to the pram without interfering with any folding mechanisms
- Make sure the arms are clear of the pram’s wheels and braking mechanisms too
- Now you’re confident of the connectors positioning, loosen the strap
- Fix Friction Tape on the uprights where the connectors will be attached
- Reposition the connector over the friction tape
- Pull the strap tight
- Turn the connector-bolt clockwise to secure the connector tightly
Once you have done the above, make sure your pram still folds properly without the interference of the buggy board. Then, check the brakes! If you have attached everything correctly, you will not need to reposition the connectors.
Step 3 – Tightening the connectors
Make sure that you have tightened the connectors so that they don’t budge! If you need to loosen them (to reposition or take off the board), turn the nut anti-clockwise until loose and voila!
Step 4 – Cut the strap!
A crucial stage in the buggy board fitting process is cutting the strap correctly. Make sure to cut the strap as close to the connector housing as possible, and smooth off any sharp edges. For your family’s safety, make sure that you don’t leave the strap uncut!
Step 5 – Revisit the arms
Now that you have attached the arms and wheels to the platform, turn it up onto its wheels. Locate the height adjustment screws and unscrew them until they are just released. Once you have done that, you will be able to rotate the arms forward and tighten the height adjustment screws back up.
Cotter pins will hold the connectors in place securely, so make sure you measure the distance between each of the connectors to get them in the right position. Your manual will have the exact measurements included to get the cotter pins facing the right direction.
You will notice that each of the arms have three holes – this is so you can choose the one that best suits your pram. The buggy board needs to be as close to the back of your pram as possible while allowing your child to stand comfortably.
A coin will be perfect for tightening the cotter pin once in the right place. If you find the arms are too short for your pram, you may need an extender kit.
Step 6 – Putting it all together
Now that you are ready to connect your buggy board to your pram, there are a few last tweeks to achieve!
- Unscrew the fixing screws
- Adjust the width of the arms according to your pram, and then click the cotter pins into the connectors
- Tighten the fixing screws until secure
- Make sure the arms are an equal distance from the centre of the board
- Double-check the cotter pins are locked in the connectors
Your buggy board is just about ready to go! All that is left is to make the platform level by unlocking the height adjustment screws. Once you are happy that everything looks roadworthy, tighten the height adjustment screws back up and away you go!
For tips on how to store, disconnect your buggy board, and more take a look at our FAQs in our Most Asked Questions About Buggy Boards.